Cake pops have become a delightful trend in desserts, combining the fun of a lollipop with the irresistible taste of cake. Central to creating these treats is their coating — what is cake pop icing made of? This article explores the variety of ingredients and methods you can use to craft the perfect cake pop icing, ensuring every bite is as delicious as it is beautiful. From traditional recipes to creative alternatives, learn how to perfect your cake pop creations with ease.
What is Cake Pop Icing?
Cake pop icing isn’t just about sweetness; it’s about the perfect blend of texture and flavor that complements the cake inside. Unlike traditional frosting or a hard candy shell, cake pop icing must balance flavor with functionality, acting as a glue to hold the cake together and a canvas for decorations.
Common Ingredients in Cake Pop Icing
The base for many cake pop icings begins quite simply, often involving just a few key components:
- Powdered Sugar: This fine sugar blends smoothly without the grittiness of granulated sugar.
- Milk: Just enough to make the sugar malleable. For those who prefer a dairy-free option, plant-based milks like almond or soy work wonderfully.
- Vanilla Extract: Adds a hint of flavor, though it’s flexible enough to swap out for other extracts depending on your taste preferences.
These ingredients are whisked together to create a smooth, flowing icing that sets quickly around the cake, forming a sweet shell that’s ready for further embellishment. For a richer flavor or different texture, some bakers might add ingredients like cream cheese or lemon zest, giving the icing a creamy consistency or a zesty bite.
Transitioning into the next section, let’s dive deeper into the traditional methods and creative alternatives for making your own cake pop icing, ensuring your treats not only look spectacular but taste divine. Keep these basics in mind as you explore further; the best cake pop icing is one that perfectly complements your chosen cake flavor and decoration scheme.
How to Make Traditional Cake Pop Icing
Creating the perfect cake pop icing involves more than just mixing ingredients; it’s about achieving the right texture and flavor that complements the cake. Here’s a straightforward method to whip up traditional cake pop icing that’s not only tasty but also has the ideal consistency for dipping and decorating.

Step-by-Step Guide to Making Cake Pop Icing
- Combine Ingredients:
- Start by sifting the powdered sugar to ensure there are no lumps. This makes your icing smooth and uniform.
- In a medium bowl, whisk together the powdered sugar, a few tablespoons of milk, and a teaspoon of vanilla extract. Start with less milk and gradually add more to get the desired consistency.
- Adjust Consistency:
- The icing should be fluid enough to coat the cake pops evenly but thick enough to set quickly. If it’s too runny, add more powdered sugar; if too thick, a little more milk.
- Flavor Customization:
- This is where you can get creative. If vanilla isn’t your thing, why not try almond, lemon, or even mint extracts? Each can add a unique twist to your cake pops.
Chocolate Coating Options
For those who prefer a decadent touch, a chocolate coating can be an irresistible alternative to traditional icing. Here’s how to master this rich addition:
- Choosing Your Chocolate:
- Opt for high-quality chocolate bars that you can melt down. Whether it’s dark, milk, or white chocolate, choose one that complements the cake flavor inside.
- Melting the Chocolate:
- Cut into pieces the chocolate and start melting it. Use a microwave or a boiler. stir frequently to prevent burning. Add a teaspoon of coconut oil to thin the chocolate slightly, which makes it easier to work with.
- Dipping Your Cake Pops:
- Once melted, let the chocolate cool slightly — it should still be fluid but not hot. Dip your cake pop into the chocolate, ensuring it’s completely coated. Tap off any excess chocolate to avoid drips.
- Setting the Chocolate:
- Place the dipped cake pops into a styrofoam block or a cake pop stand to set. This should take only a few minutes if the chocolate is at the right temperature.
By following these guidelines, you’ll create a coating that not only looks professional but also packs a punch of flavor. As you get comfortable with these basics, feel free to experiment with mix-ins like sea salt or espresso powder to elevate your chocolate coating even further. Next, we’ll explore some creative and alternative icing ideas that can bring a new level of excitement to your cake pops.
Creative and Alternative Icing Ideas
When it comes to decorating cake pops, the sky’s the limit. Beyond traditional icing and chocolate coatings, there are numerous ways to infuse creativity and personal flair into each bite-sized treat. Here are some innovative ideas to inspire your next batch of cake pops.
Exploring Non-Traditional Flavors and Textures
- Cream Cheese Icing:
- For a tangy twist, blend softened cream cheese with powdered sugar and a dash of vanilla. This icing is particularly great with red velvet or cinnamon cake pops.
- Vegan Icing Options:
- To cater to all dietary preferences, use coconut milk and vegan butter as substitutes in your icing recipes. Flavor with natural extracts like orange or peppermint for a refreshing change.
- Colored Icing:
- Brighten up your cake pops with food coloring. Gel food colors offer vibrant shades without altering the texture of the icing. For a naturally colored option, try using beet juice for red or turmeric for yellow.
Incorporating Unique Ingredients
- Luxe Add-Ins:
- Mix in finely ground nuts, toasted coconut, or even small candy pieces into your icing before dipping for added texture and flavor.
- Espresso-Infused Chocolate:
- Melt dark chocolate and stir in a shot of espresso for a sophisticated mocha coating. This pairs wonderfully with vanilla or chocolate cake pops.
- Spiced Icing Varieties:
- Add spices such as cinnamon, nutmeg, or cardamom to your icing mix to complement festive occasions or simply to warm up the flavor profile.
Solving Common Icing Problems
Even with the best recipes, sometimes you may encounter issues with your cake pop icing. Here are some clues to assist you with any unforeseen challenge:
- Icing Too Thin:
- If your icing is too runny, gradually mix in more powdered sugar until you achieve a thicker consistency that adheres well to the cake pops without dripping.
- Icing Not Setting:
- Ensure your cake pops are completely cool before dipping. If the icing still doesn’t set, place the dipped cake pops in the refrigerator for a few minutes to harden.
- Cracking Icing:
- Cracks can occur if the icing sets too quickly or if the cake pops are too cold when dipped. To prevent this, let your cake pops adjust to room temperature slightly before coating.
By expanding your repertoire with these creative and alternative icing ideas, you not only enhance the visual appeal of your cake pops but also elevate their taste profiles. With each new recipe and technique, you’ll discover more ways to delight and surprise with these delectable treats. Next, we’ll dive into the finer points of decorating cake pops to truly make them stand out at any gathering.
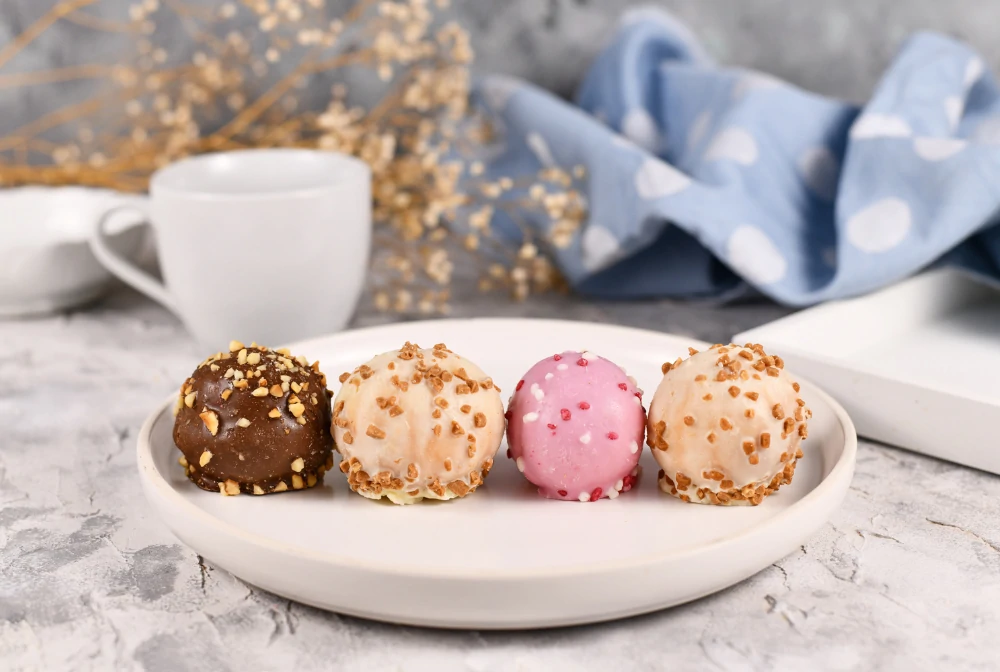
Decorating Techniques for Cake Pops
Decorating cake pops is where you can really let your creativity shine. Whether for a party, a gift, or just a fun kitchen project, the right decorations not only make your cake pops visually appealing but can also add layers of flavor and texture.
Ideas for Embellishing Your Cake Pops
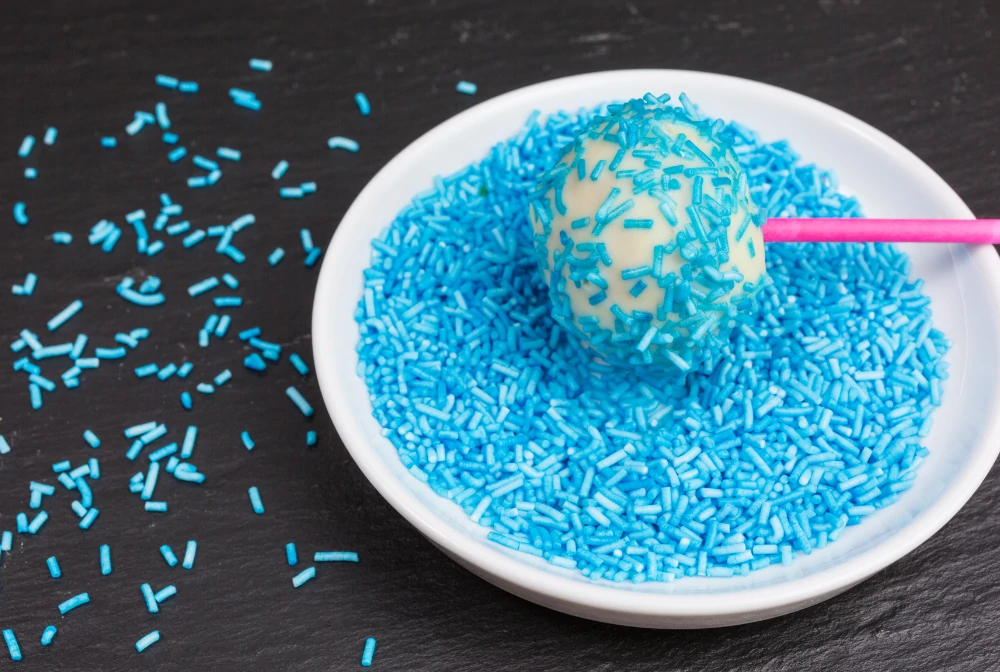
- Sprinkles and Edible Glitter:
- Before your icing or chocolate sets, roll the cake pops in sprinkles, edible glitter, or colored sugar for a festive touch. This is a great way to add color and fun, especially for children’s parties.
- Drizzles and Swirls:
- Melt a contrasting color of chocolate or icing and use a spoon or a piping bag to drizzle it over the set cake pops. This method adds an elegant finish and can be as simple or intricate as you like.
- Themed Decorations:
- Tailor your cake pop decorations to fit the theme of an event. Use fondant or modeling chocolate to create small figures or designs, such as flowers for a wedding or pumpkins for a Halloween bash.
Expert Tips for Perfect Decorations
- Timing is Everything:
- Add any non-melting decorations while the coating is still wet. This ensures they stick but don’t sink into the coating. For melted decorations like chocolate drizzles, wait until the base layer has set to prevent them from blending together.
- Use a Dipping Stand:
- Invest in or make a cake pop stand to hold your cake pops while they set. This not only keeps them from touching each other and ruining the coating but also helps prevent smudges as you add further decorations.
- Maintain Consistency:
- Keep your icing and chocolate at a consistent temperature while working. This helps maintain a smooth finish and makes it easier to work with multiple batches.
Frequently Asked Questions
To wrap up, let’s address some common questions about cake pop icing, providing further clarity and tips to ensure your success.
- Can I make icing in advance?
- Yes, you can even store them in refrigerator and make sure to stir it well before using.
- What are the best ways to store decorated cake pops?
- Once fully decorated and set, cake pops should be stored in an airtight container in the fridge. They can typically be kept for up to a week without losing their quality.
- How do I prevent my cake pops from falling off the sticks while decorating?
- Dip the tip of the stick in a little of the coating before inserting it into the cake ball. This acts like glue, helping the cake stick better to the stick during the decorating process.
By mastering these decorating techniques and considering these FAQs, you can enhance your cake pop-making skills and enjoy creating these delightful treats that look as good as they taste. Whether you’re a seasoned baker or a beginner, the world of cake pop decoration offers endless possibilities to explore your culinary creativity.
Solving Common Icing Problems
Even the most experienced bakers can run into issues when working with cake pop icing. Here are some practical solutions to common problems that can help you achieve perfect results every time.
Icing Too Thin
- Powdered Sugar Adjustment:
- If your icing is too runny, the quickest fix is to gradually add more powdered sugar until you reach the desired thickness. Mix slowly to avoid creating lumps.
- Chill Out:
- Sometimes, simply chilling the icing for a few minutes before use can help it thicken up, especially if your kitchen is warm.
Icing Not Setting
- Temperature Check:
- Make sure your cake pops are at room temperature before you start dipping. If they’re too cold, the icing might not set properly and could start to drip.
- Fridge Fix:
- If the icing still isn’t setting, a quick stint in the fridge after dipping can help speed up the setting process.
Cracking Icing
- Avoid Temperature Extremes:
- Cracking often occurs if there’s too much of a temperature difference between the cake pops and the icing. Ensure both are at similar temperatures to minimize this risk.
- Smooth Movements:
- When dipping, do it in one smooth motion and avoid multiple dips, which can cause the icing to set unevenly and crack.
Ensuring Even Coating
- Consistent Dipping:
- To get an even coating, let excess icing drip off by gently tapping the stick on the side of your bowl. Rotate the cake pop slowly to help the icing cover evenly.
- Tool Assistance:
- Use a small spatula or the back of a spoon to help spread the icing if it’s not smoothing out on its own.
Cake Pop Storage Tips
Storing your cake pops correctly is crucial to maintaining their quality and freshness. Here are some tips to ensure your cake pops stay delicious:
- Airtight Containers:
- Store your cake pops in an airtight container to keep them from drying out. If possible, separate layers with parchment paper to prevent them from sticking together.
- Refrigeration:
- Keep them in the refrigerator if you’ve used perishable ingredients in the icing or filling. This will help keep them fresh and prevent spoilage.
- Freezing for Longevity:
- You can store the cake pops for a long-term by using a cling film to wrap each one and placing it in a freezer bag. They can last for up to a month without losing flavor or texture.
By tackling common icing issues and understanding the best ways to store your creations, you can ensure that your cake pops are not only beautiful but also a delight to eat. Each problem has a solution, and with these tips, you’re equipped to handle whatever cake pop challenges come your way. Enjoy the process of making and decorating cake pops, knowing that you have the knowledge to achieve great results every time.
Decorating Techniques for Cake Pops
Decorating cake pops is where you can really let your creativity shine. Whether for a party, a gift, or just a fun kitchen project, the right decorations not only make your cake pops visually appealing but can also add layers of flavor and texture.
Ideas for Embellishing Your Cake Pops
- Sprinkles and Edible Glitter:
- Before your icing or chocolate sets, roll the cake pops in sprinkles, edible glitter, or colored sugar for a festive touch. This is a great way to add color and fun, especially for children’s parties.
- Drizzles and Swirls:
- Melt a contrasting color of chocolate or icing and use a spoon or a piping bag to drizzle it over the set cake pops. This method adds an elegant finish and can be as simple or intricate as you like.
- Themed Decorations:
- Tailor your cake pop decorations to fit the theme of an event. Use fondant or modeling chocolate to create small figures or designs, such as flowers for a wedding or pumpkins for a Halloween bash.
Expert Tips for Perfect Decorations
- Timing is Everything:
- Add any non-melting decorations while the coating is still wet. This ensures they stick but don’t sink into the coating. For melted decorations like chocolate drizzles, wait until the base layer has set to prevent them from blending together.
- Use a Dipping Stand:
- Invest in or make a cake pop stand to hold your cake pops while they set. This not only keeps them from touching each other and ruining the coating but also helps prevent smudges as you add further decorations.
- Maintain Consistency:
- Keep your icing and chocolate at a consistent temperature while working. This helps maintain a smooth finish and makes it easier to work with multiple batches.
Frequently Asked Questions
To wrap up, let’s address some common questions about cake pop icing, providing further clarity and tips to ensure your success.
- Can I make icing in advance?
- Yes, most icings can be made in advance and stored in the refrigerator. Just be sure to give it a good stir to bring it back to the right consistency before using.
- What are the best ways to store decorated cake pops?
- Once fully decorated and set, cake pops should be stored in an airtight container in the fridge. They can typically be kept for up to a week without losing their quality.
- How do I prevent my cake pops from falling off the sticks while decorating?
- Dip the tip of the stick in a little of the coating before inserting it into the cake ball. This acts like glue, helping the cake stick better to the stick during the decorating process.
By mastering these decorating techniques and considering these FAQs, you can enhance your cake pop-making skills and enjoy creating these delightful treats that look as good as they taste. Whether you’re a seasoned baker or a beginner, the world of cake pop decoration offers endless possibilities to explore your culinary creativity.
Conclusion
Crafting the perfect cake pop is an art that combines baking skills with creative flair. From the smooth, sweet icing that wraps around each moist cake ball to the colorful and whimsical decorations that top them off, every element of a cake pop can be customized to suit any taste or occasion. As we’ve explored various techniques and addressed common questions, it’s clear that making cake pops is both an enjoyable and rewarding endeavor.
You need patience and a lot of practice, so don’t hesitate to experiment with different flavors, coatings, and decorations to find what works best for you. Whether you’re preparing for a special event or just looking for a fun and tasty project, cake pops offer a versatile and delightful way to express your culinary creativity.
So gather your ingredients, unleash your imagination, and start dipping and decorating! With the guidelines and tips provided in this article, you’re ready to create beautiful, delicious cake pops that will impress and delight anyone who tries them. Enjoy the process and the pleasure of sharing your handmade treats with friends and family. Happy baking!